
Creating a website is like building a house. You need a solid foundation, a well-thought-out blueprint, and a clear vision of the final product before you can start putting it all together. In this blog post, I’m pulling back the curtain on my process so you can see how I plan and create websites from start to finish. It’s not just about making things look good—it’s about making sure the site is functional, user-friendly, and tells the right story.
Here’s how I go from idea to wireframe, step by step.
Step 0: Starting with a Creative Brief
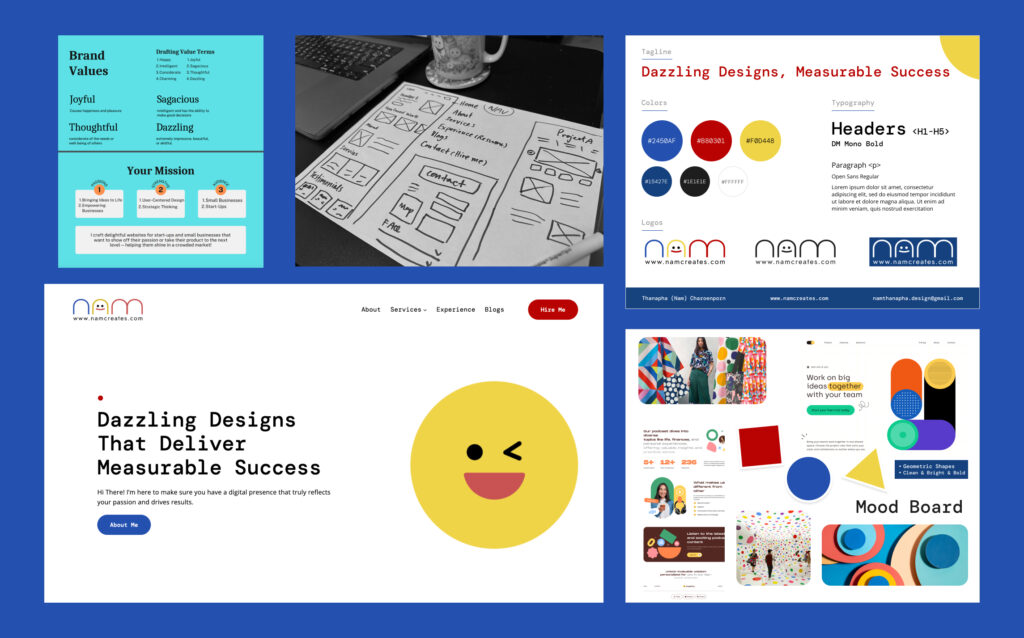
Before jumping into design or planning, I always begin with a creative brief. This document is essentially a roadmap that outlines the client’s objectives, target audience, brand values, and any specific features they want for their website. It helps me clarify the project’s scope, align expectations, and ensure we’re both on the same page from the get-go.
The brief serves as a reference point throughout the design process, guiding decisions and keeping the project focused on achieving the client’s goals.

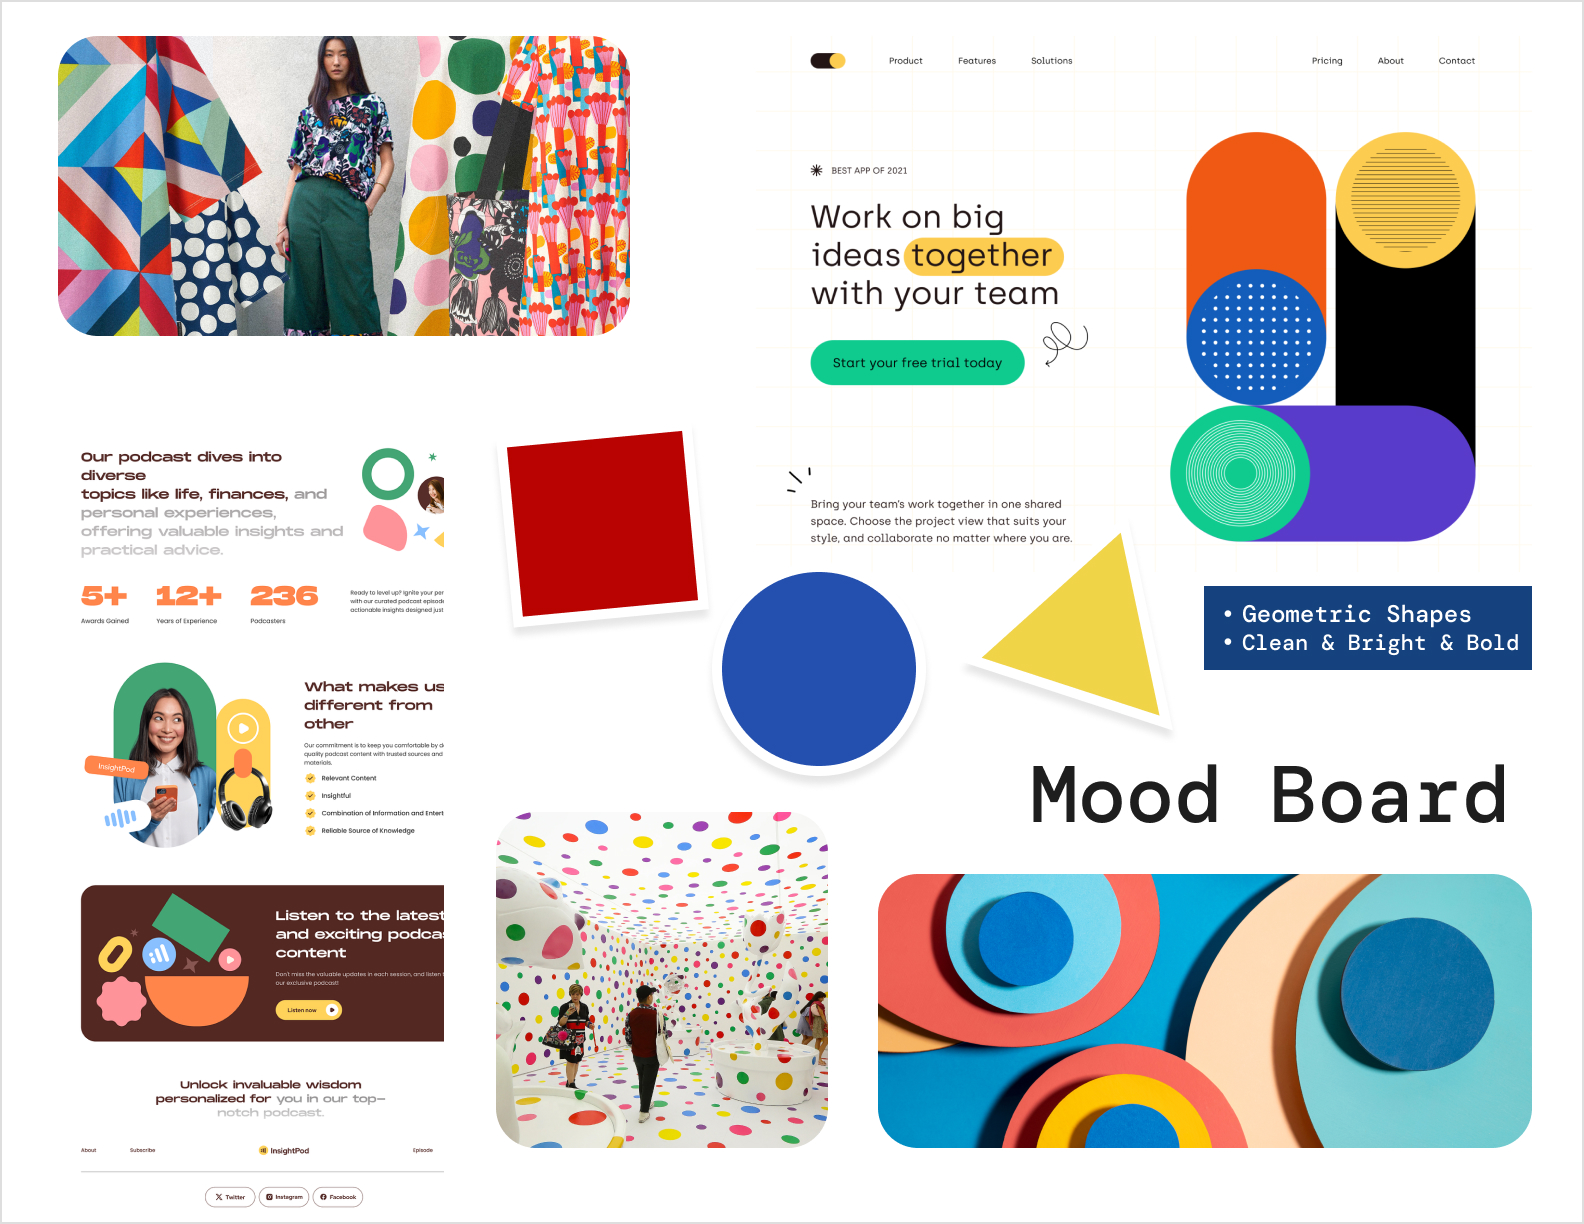
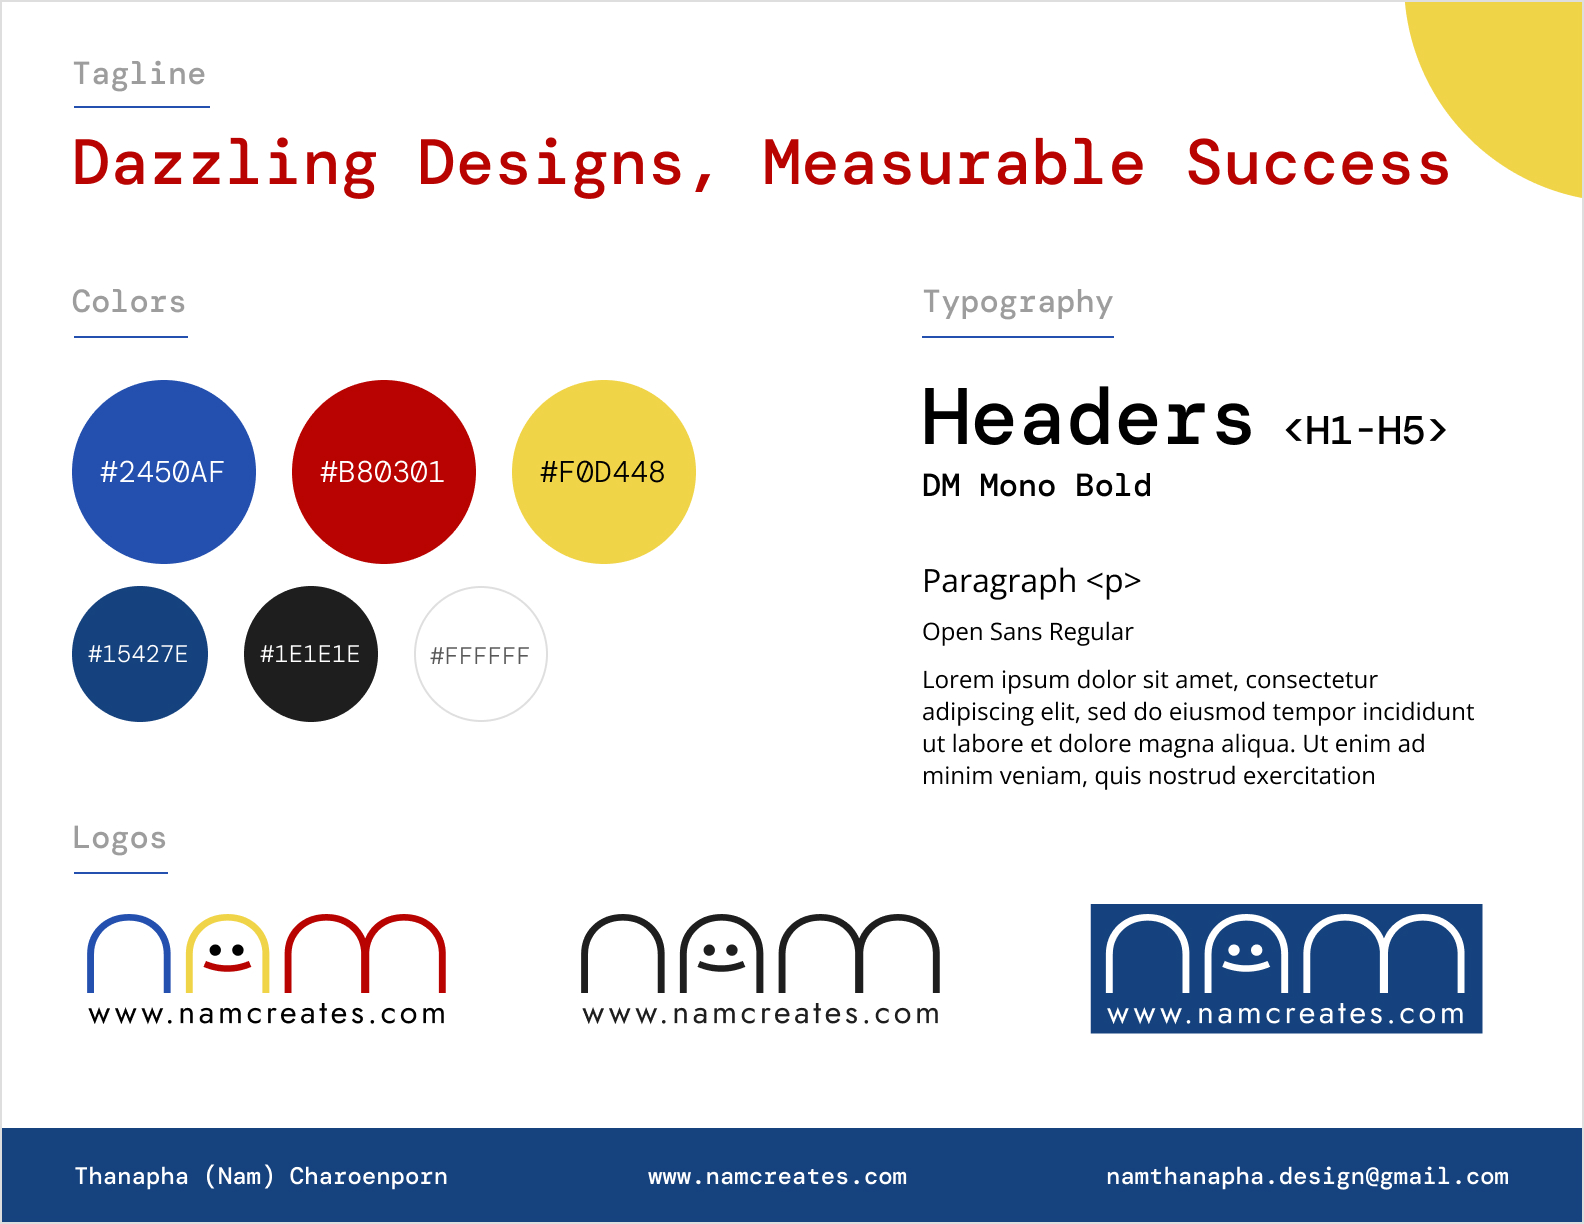
Step 1: Setting the Mood – Style Tile and Mood Board
Every project begins with the visuals. To get a sense of what the website should feel like, I create a style tile and mood board. These help me gather inspiration and lock in the right color palette, fonts, and overall vibe. It’s a bit like picking out paint swatches and furniture before decorating a room—you want everything to go together, but you also want it to express the brand’s unique personality.
For this particular project, I went for a clean and modern look, using soft earthy tones with pops of teal to keep things fresh and inviting. The fonts are sleek and professional, while the imagery has a light, approachable feel. Getting this part right sets the tone for the whole project, ensuring that the design speaks to the target audience.
Step 2: Laying the Groundwork – Sitemap
Once the visual direction is clear, it’s time to figure out how the site will be structured. Enter the sitemap. Think of it as a map that shows all the pages and how they connect, ensuring visitors can easily find their way around.
For this website, the sitemap includes:
- Home
- About (which covers About Me andMy Values)
- Experience
- Services (Web Design, Graphic Design, Web Development)
- Projects (Case Studies)
- Blog
- Contact
Keeping the navigation simple and intuitive is key here. I never want visitors to feel lost or overwhelmed, so the sitemap helps me make sure everything flows smoothly.
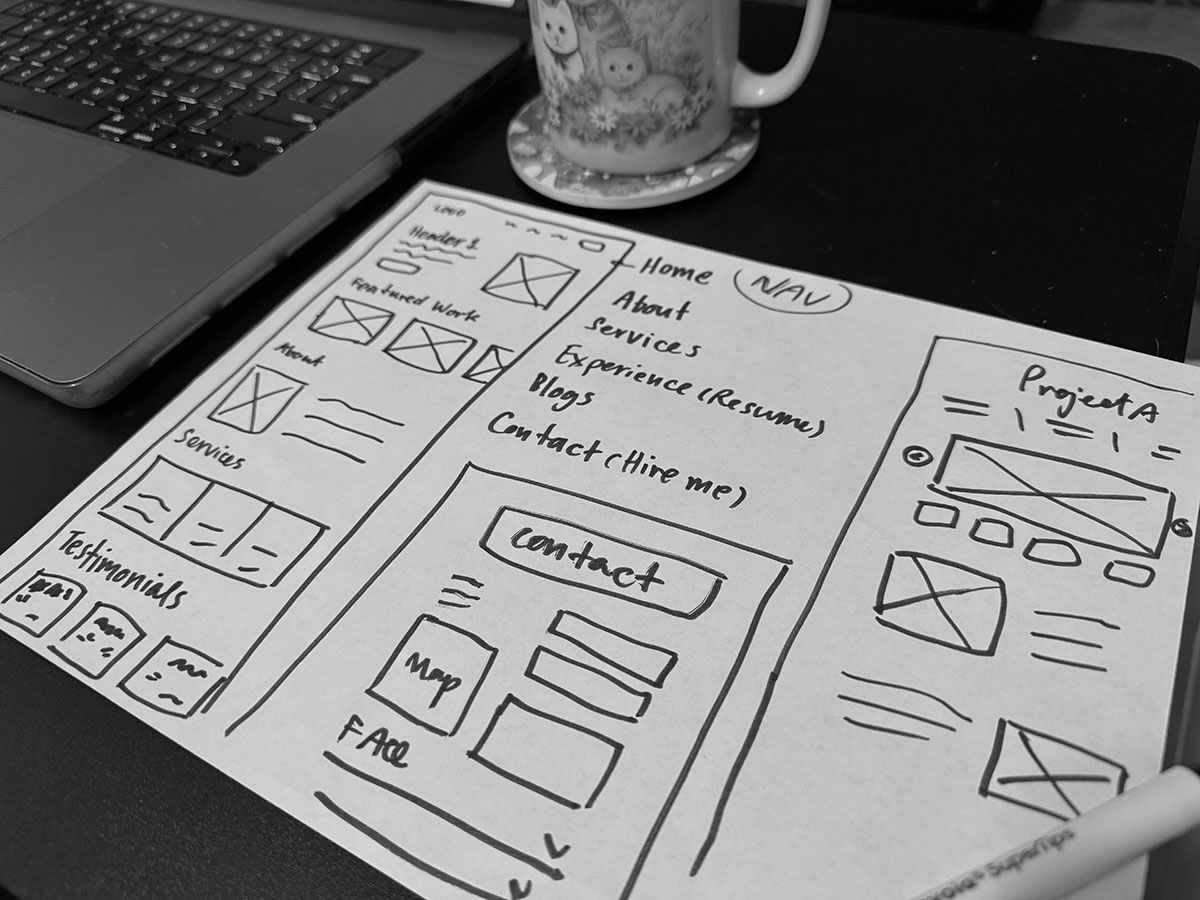
Step 3: Mapping It Out – Wireframes
With the sitemap in place, I move on to wireframes. This is where I sketch out the structure of each page without worrying about the finer design details just yet. It’s like drawing a blueprint for a house—you’re deciding where the walls, doors, and windows go, but you’re not picking out the paint colors just yet.
For this project, I focused on clean layouts that put the user first. The homepage highlights key services right at the top, along with a showcase of my recent work. Each service page has a clear description and examples of my past projects, and there’s a strong call-to-action button to make it easy for potential clients to get in touch.
Step 4: Putting It All Together
Once the planning is done, I can jump into the fun part: designing and building the site. By now, I have a clear direction thanks to the mood board and style tile, a solid structure with the sitemap, and a layout that’s mapped out in the wireframes. This groundwork makes the design process smooth and ensures that everything comes together seamlessly.
Good planning is the secret sauce behind any successful website. It’s what allows me to create sites that don’t just look good, but also work well and make sense for the user. This process gives me a roadmap to follow and ensures that my clients get exactly what they need.
Thanks for reading! Stay tuned for more posts where I’ll dive into design tips, trends, and strategies for creating websites that truly shine.
Leave a Reply